Beyond the standard rule, the ideal hanging height is heavily influenced by your room’s vertical volume, as taller ceilings often require the fixture to be positioned slightly higher to maintain visual proportion.For every additional foot of ceiling height above the standard eight feet, experts suggest adding three to six inches to the total hanging height. To understand how these vertical dimensions interact with your specific room layout, let’s explore the adjustments needed for various ceiling types.
Furthermore, the physical scale and bulk of the pendant light itself play a crucial role, where larger, more opaque fixtures may need to be hung higher to prevent the space from feeling cramped, while smaller, transparent designs can sit lower to create an intimate atmosphere. This relationship between size and height is vital for preventing visual “clutter” in the center of your dining area.
Below, we will detail how to adapt your lighting plan to the specific diameter and style of your chosen fixture.Finally, achieving the perfect ambiance involves more than just vertical placement; it requires careful consideration of horizontal spacing for multiple lights and the technical quality of the light itself, such as color temperature and glare control. By mastering these micro-nuances, you can transform a standard dining set into a professionally designed focal point. To help you achieve this, we have provided a comprehensive guide below that covers everything from initial measurements to the final visual “balloon test.”
What is the Standard Height to Hang Pendant Lights Over Dining Table?
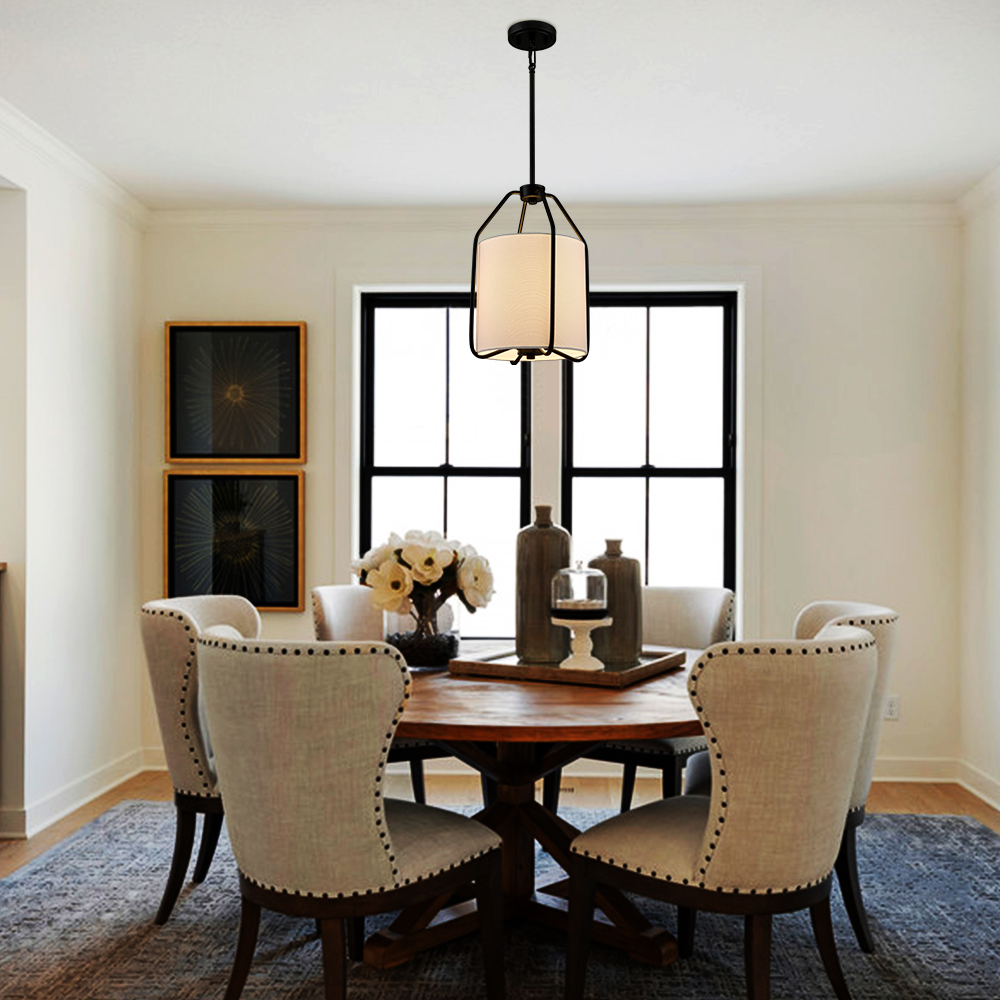
The standard hanging height for a dining room pendant is a foundational design rule originating from interior architecture that specifies a gap of 30 to 36 inches from the table surface. This range is characterized by its ability to balance eye-level comfort with effective light distribution across the dining plane.
Following this standard is essential because it anchors the lighting fixture within the “human scale” of the room. Specifically, when a light sits within this 30-36 inch window, it creates a dedicated “zone” for the table, separating the dining experience from the rest of the open-plan living space. To illustrate this further, if the light is hung at 30 inches, it tends to feel more intimate and “bistro-like,” whereas 36 inches provides a more formal and open feel.

According to lighting design standards maintained by the American Lighting Association, the bottom of the pendant should also sit roughly 66 to 76 inches above the floor for a standard 8-foot ceiling. This dual-measurement approach ensures that both the tabletop clearance and the overall room flow remain unobstructed for homeowners of varying heights.
How Does Ceiling Height Affect Your Pendant Light Placement?
There are three primary adjustment tiers for hang pendant lights over dining table based on the criterion of ceiling height: the Standard 8-foot rule, the 10-foot adjustment, and the Vaulted ceiling extension. Each tier requires specific incremental additions to the hanging length to ensure the cord doesn’t look too short or the light too low.
Ceiling height dictates the visual leverage of the fixture; as the ceiling rises, the “empty space” above the table increases, necessitating a higher light placement to prevent the fixture from appearing “lost.” Specifically, for a 10-foot ceiling, you should generally hang the light approximately 6 to 12 inches higher than you would for an 8-foot ceiling. This prevents the cord from looking like a thin, strained line and instead makes it a purposeful part of the vertical decor.
- 8-Foot Ceilings: Stick strictly to the 30-36 inch tabletop clearance.
- 9-Foot Ceilings: Add 3 inches to the clearance (33-39 inches total).
- 10-Foot+ Ceilings: Add 6 inches for every additional foot, ensuring the fixture remains visible but not intrusive.
In high-volume rooms, the goal is to bridge the gap between the high architectural lines and the functional dining surface. By following these increments, you maintain the “visual weight” of the light in the room’s center. For example, in a 12-foot vaulted dining room, a large pendant might hang 48 inches above the table, which would feel high in a small room but perfectly proportional in a grand hall.
Does the Size of the Light Fixture Change the Hanging Rules?
Yes, the size of the pendant light fixture absolutely changes the hanging rules because its visual mass, opacity, and diameter directly affect how much space it consumes in the user’s field of vision. A larger fixture creates more “visual weight” and usually requires higher placement to avoid overwhelming the table.
The size of the fixture impacts sightlines; a bulky, 30-inch wide drum pendant hung at 30 inches will act as a wall between guests, whereas a slim glass globe at the same height would feel unobtrusive. Specifically, larger fixtures should be pushed toward the 36-inch mark to “open up” the table’s airspace. Important considerations include:
- Bulky/Opaque Materials: These block light and views, requiring a higher mounting point.
- Minimalist/Glass Designs: These can hang lower as they do not significantly interrupt the line of sight.
- Table-to-Fixture Ratio: The fixture should generally be 1/2 to 2/3 the width of the dining table to look proportional.
How to Use the “Balloon Test” Before Final Installation?
The Visual Simulation Method involving a string and a balloon or paper cutout is a 3-step process designed to confirm the optimal hanging height before committing to electrical work. This DIY technique allows you to experience the physical presence of the light in real-time.
To perform the test, first, cut a piece of cardboard or blow up a balloon to the approximate diameter of your chosen light. Second, tape a string to the ceiling and attach the “dummy” fixture at the 30-inch mark. Finally, have household members sit at the table to verify that they can see each other clearly without the “fixture” blocking their faces. Specifically, this prevents the common mistake of installing a light too low and having to redo the wiring, saving both time and money.
How Should You Calculate Spacing for Multiple Pendant Fixtures?
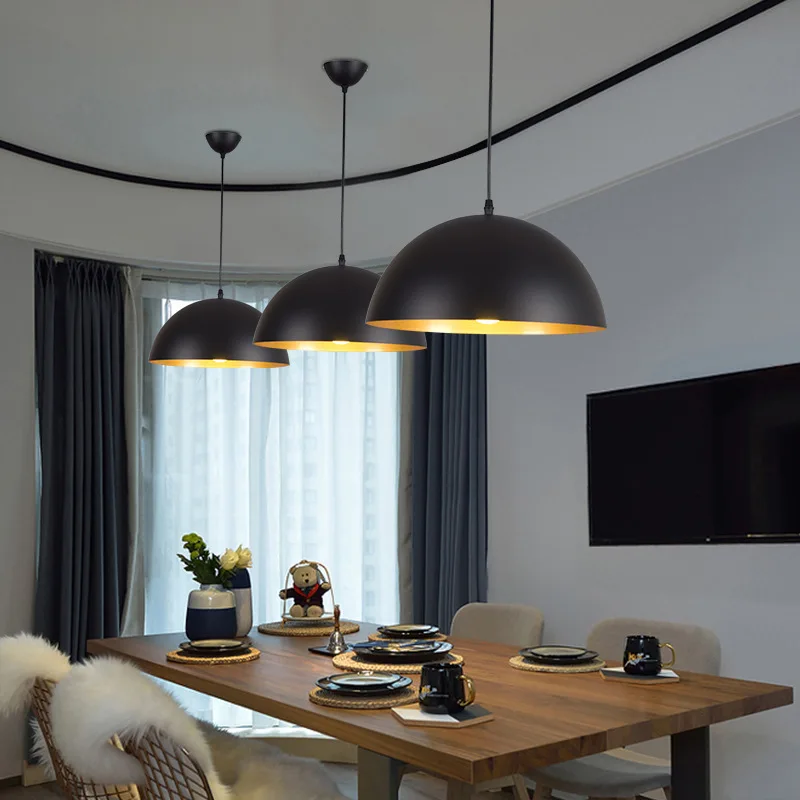
There are two core spacing rules for multiple pendants: the 31.5-inch (80 cm) interval rule and the 12-inch edge-clearance rule, both calculated based on the total length of the dining table. These criteria ensure that light is distributed evenly across the surface without the fixtures appearing cluttered.
Calculating spacing requires balancing the number of units against the table’s dimensions. Specifically, if you are hanging three pendants over a 72-inch table, you should find the center point and space the outer lights roughly 24 to 30 inches away from the center light. This creates a rhythmic, symmetrical look. Consider the following criteria:
- The Rule of Three: Odds numbers are generally more aesthetically pleasing to the human eye.
- Edge Clearance: Ensure the outermost pendants are at least 12 inches away from the table’s edge to prevent guests from bumping into them.
- Uniform Height: Regardless of spacing, all pendants in the set must hang at the exact same height above the table.
Linear Pendants vs. Multi-light Chandeliers: Do the Rules Change?
Linear pendants win on coverage for long rectangular tables, while multi-light chandeliers are optimal for round or square tables due to their centralized light distribution. While a linear pendant is a single, long unit that mimics the table’s shape, a chandelier radiates light from a central point, affecting how you perceive the height.
The choice between linear and centralized fixtures depends on the table’s geometry. Specifically, a linear pendant can often be hung slightly lower (around 32 inches) because its narrow profile doesn’t obstruct views as much as a wide chandelier might. Conversely, a multi-tier chandelier might need to hang pendant lights over dining table at 36 inches or higher because its vertical height could otherwise interfere with the centerpiece or table decor. According to a 2023 design trend report by Houzz, linear lighting has seen a 45% increase in popularity for modern open-concept kitchens and dining areas due to its sleek horizontal profile.
Can Lighting Temperature and CRI Impact the Dining Experience?
There are three technical factors—Color Temperature (Kelvin), CRI (Color Rendering Index), and Dimming—that define the quality of the dining environment. These rare attributes extend beyond simple height to influence how food looks and how comfortable guests feel during a meal.
Lighting quality directly affects the biological and sensory experience of dining. Specifically, a high CRI (90 or above) is essential over a dining table because it ensures that the colors of the food appear vibrant and appetizing rather than dull or grey. When combined with the correct hanging height, these technical specs create a professional-grade atmosphere. Key factors include:
- Warmth (2700K – 3000K): This Kelvin range mimics candlelight and promotes relaxation.
- CRI 90+: Vital for “food-centric” spaces to reveal the true reds and greens of a meal.
- Dimmability: Allows you to transition the height’s effect from bright “task lighting” for homework to “mood lighting” for dinner parties.

How to Prevent Glare and Bare Bulb Exposure?
The Anti-Glare Strategy involves a 2-factor approach: selecting fixtures with diffusers and using specialized bulbs to ensure that sitting at the table remains a comfortable experience. This is especially important when hanging lights at the lower end of the 30-36 inch spectrum.
To eliminate glare, homeowners should first opt for pendants with frosted glass or a fabric shade that softens the light output. If using an open-cage design, the second step is to install “silver-tipped” or “half-chrome” bulbs which reflect light back up into the fixture rather than directly into the diners’ eyes. Specifically, this prevents the “interrogation room” effect where a bare bulb shines too intensely at eye level. By combining proper height with glare-prevention bulbs, you ensure that the light is felt as a warm glow rather than a harsh distraction.
In summary, while the 30–36 inch rule is your starting point, your final decision should be a blend of ceiling height adjustments, fixture scale, and technical light quality when you hang pendant lights over a dining table. By utilizing the balloon test and ensuring high CRI levels, you can create a dining space that is both visually stunning and perfectly functional for years to come.
Source:
- https://images.unsplash.com/photo-1540518614846-7eded433c457
- https://ae01.alicdn.com/kf/S33581613b37540cbb46b5d0228278d14J.jpg
- https://cdn.shopify.com/s/files/1/0554/3041/4533/files/SP104GB_contemporary_1.jpg?v=1745837370
- https://www.claxy.com/storage/uploads/images/2024/06/25/1719286806_SJRSoZ7Tlw.jpg